Saturday 31 October 2020

Bramble Jelly and Dyeing with Blackberries

My favourite jam when I was a child was Robertson's Bramble Seedless. So you can imagine how pleased I was when a recipe for Bramble Jelly appeared in my inbox!  And do you know where it came from - the lovely people over at Cambridge Imprint who produce those gorgeous patterned papers and stationery.  Here's some origami stars in their fab papers from their star garland kit...

Cambridge Imprint Paper Stars From Their Origami Star Garland Kit

You can find their recipe here.  It's super easy and it's delicious - which is great because my only other attempt at jam was a bit of a concrete nightmare!
 
Blackberry Gloop - A By-product of Bramble Jelly

But do you know what was also great about this endeavour?  It provided lots of Blackberry gloop which was strained off when making the jam.  This was great for natural dyeing!  I wrapped the gloop in some muslin, tied it up with an elastic band, and put it in a pan with some water and turned up the heat.  
 
Blackberry Dye Bath

I added a small amount of calico, muslin, linen thread and wool yarn all of which had been washed beforehand to remove any surface dressing.  These were all simmered together in the blackberry dye bath for an hour or so and then left to cool in the liquid over night.  
 
Unmordanted Fabric in the Dye Bath

The next day, having removed the dyed textiles, I did the same again but this time, the textiles added had been pre-modanted with alum.  A mordant is a dye fixative.  It helps bind the dye to a fabric to make it more colourfast and can affect the resulting colour.
 
 
Mordanted Fabric in the Dye Bath
 
When both sets of textiles had been washed I put half of each into some iron water (made from leaving some rusty nails in a water and distilled vinegar solution for several weeks) to modify the colour.  Iron generally has the effect of darkening the colour, often resulting in grey tones.  It should also increase the colourfastness of the textile in terms of light and washing.
 
Blackberry Dyed Unmordanted Textiles
 
Blackberry Dyed Unmordanted Textiles + Iron Water

Blackberry Dyed Mordanted Textiles

Blackberry Dyed Mordanted Textiles + Iron Water

It was good to be able to see the different results depending on the addition or not of the mordant and the iron water.  The iron water could have done with some filtering as the rusty particles have left brown rusty patches on the fabric where they came into cobtact with it.

By the way, we made so much Bramble Jelly that I've got some more blackberry gloop in the freezer if I want to have another go!


Saturday 24 October 2020

Open Exhibition 2020 at the Harley Gallery

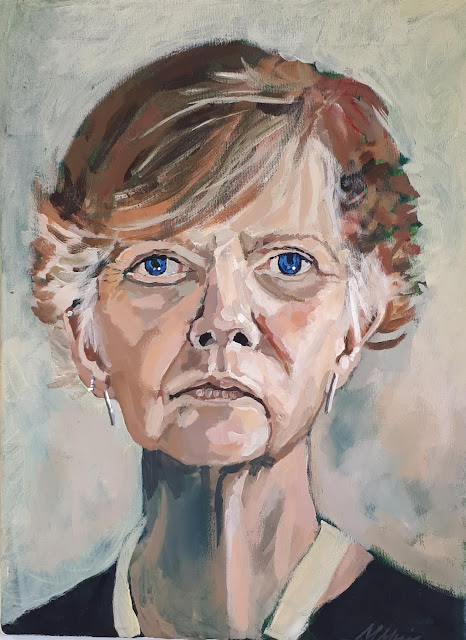
Self-Portrait from Travel Card - Alistair Mavin

The Open Exhibition at the Harley Gallery in Welbeck, Nottinghamshire is made up of selected artworks made within 100 miles of the gallery.  Here are some of my top choices...

Alistair Mavin's Self-Portarit was made up of postage stamps
 
St Dymphna - Patron Saint of Stress & Anxiety - Susan Dodd

Eruption of Waders (Humber Estuary) - Stephen Todd

Glitch - Roanna Wells

Kingfisher (Blue Lobster) - Lucy Stevens

Let Them Eat Cake - Chris Cooper

Social Isolation - Marie Muir

Distant Boundaries - Myfanwy Williams

Francis and the Birds - Jaqueline Warrington

Under the Blossom Tree - Maria Emilov

Rabbit Hole Day - Susan Isaac

Juxtapose - Gill Edwards

As you can see there's a wide range of styles and media.  These are just a few of the works on show.  There are lots more fantastic pieces.  There's a cafe just next door, a farm shop and plenty of carparking.

Islanded Tent - Joanna Whittle

There's also an exhibition called Between Islands by Joanna Whittle, who won the open exhibition in 2019.  This explores the relationship between ‘creating worlds’ and ‘creating collections’ and the role curation and display of collections plays in developing narratives – real or imagine.

These exhibitions were due to continue until Sunday 1 November 2020 but had to close from Friday 30 October 2020 due to Covid Tier 3 restrictions. The cafe and gallery shop are still open however.


Sunday 18 October 2020

Can-Do Crafts - Stitched Panel


The City of York Embroiderers' Guild is making a wallhanging for the Folk Hall in New Earswick, York to represent the groups that meet there.  I have been making the panel for the Can-Do Crafts group.  My brief included the size of the panel, that it should be landscape in orientation and that it must include the group's name.  Apart from that, I had free rein.  I spoke to textile artist, Deborah New, who took the group in 2019/2020 to find out what the group had been making.  It sounded like a great group to be part of - they'd tackled weaving, patchwork, felting, simple embroidery and stitching and other textile based crafts.  Deborah also promoted the use of recycling and upcycling in her teaching to make best use of resources.  (If you like the sound of Deborah's style, she is teaching a Hand Stitched Fabric Robins workshop on Zoom with York Learning on 28 November 2020.  You can find out more here.)

Blue/black denim base fabric

In keeping with Deborah's recycling ideas I used some blue/black denim from an old pair of jeans as the base fabric and hoped to use scraps and leftover fabrics, threads and yarns for everything else. 

Various Fonts

Starting with the group's name, I printed it out in a number of different fonts and sizes to see what would work with the panel size - something quite tall and not too wide was what I was looking for. It turned out that Bahnschrift Condensed fitted the bill! The printed out font acted as a template for the letters.  Next, using scraps of colourful patterned fabrics I ironed on bondaweb, a double sided fabric adhesive with a paper backing.  Then using the printed letters that I had already cut out, I reversed them, placed them on the bondaweb paper backing, drew round them and cut them out. 

Font Template and Cut Out Bondawebbed Letters

These were then ironed onto the base denim fabric after the paper backing had been removed.  I had zigzagged the edges of the denim panel to stop them fraying and had stitched a line round (to be removed later) beyond which I didn't want to go when adding the rest of the design so that it wouldn't get lost in the seams.  I allowed a little more than the seam allowance to be on the safe side.
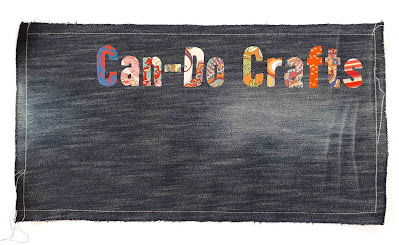
Lettering Ironed in Place

I had chosen 3 of the techniques the group had learned to make small pieces to be part of the panel - weaving, patchwork and felting... 

Weaving

Patchwork

Small Felted Purse

Also, I thought it would be nice to add some text to the piece mentioning some of the techniques used.  This was done as though it was the thread coming out of a needle.  To make the needle, I ironed some bondaweb onto the back of a scrap of silver fabric and drew a needle shape, which was then cut out, ironed on and machine stitched in position.  Using tailors chalk I roughly drew a line where I wanted the stitching to be and set off.  I had a practice go on a spare bit of denim that helped me decide how to place the words.
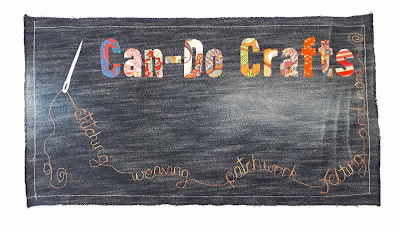
Wording Complete

After that, I machine stitched round the letters of the group's name twice, and stitched the three sample pieces in position.  The patchwork piece was machine stitched on.  The weaving sample was hand sewn in position and the felt purse was attached with a combination of the two. As a final touch I added some simple embroidery stitches - chain stitch and cross stitch, that the group might have used in their work.  Finally I took out my stitching guidelines round the edge and the panel was complete...

Finished Panel for the Can-Do Craft Group

And now it's on its way to join the other panels.