Showing posts with label dyeing. Show all posts

Sunday, 29 September 2024

Revive Your Wardrobe

Wearing a dress dyed navy & stitched
(Dyed with Dylon Machine Dye)

We all have clothes in our wardrobe that we quite like but somehow they don't get the wear they deserve or we might be trying out Second Hand September, promoted by Oxfam, in a bid to take a more sustainable approach to our wardrobe.  By buying second hand, we can take a stand against fast fashion and reduce our carbon footprint. And if you have bought something second hand from a charity shop or one of the increasing number of online resale sites (e.g. Vinted, eBay, Thrift+) it may turn out to be not quite what you'd hoped for. So, do you donate the currently unsuccessful garment to your favourite charity shop, or sell it again on a resale site? 

Perhaps try a different approach...

Dress stitched to cover marks
Dress & stitching then dyed navy

If you don't like the colour but the item is otherwise great - think about dyeing it. There are a number of important things to bear in mind here. Firstly, think of colour mixing rules. If the garment is red and you dye it blue it will end up purple. If it's yellow to start with, it will turn a shade of green and so on. If the fabric is patterned you will probably still be able to see the pattern after you dye the garment...

Check pattern is still visible when overdyed with navy

If it has top stitching, this may not dye as the thread is often synthetic. Will the colour you are dyeing the garment look good if the topstitching stays the undyed colour? Also, it is quite hard to get a true black.  Garments dyed black will often come out a dark grey. Will you mind? 

And very importantly, are you using the right dye? Cotton, linen and viscose turn out very well when dyed in the washing machine with Dylon machine dyes and you don't need to add anything else. It won't cover bleach, and stains and faded areas may still remain. You can dye the above fabrics and silk, ramie, wool and cashmere using RIT All-Purpose dye which is an alternative dye product. If you are dyeing synthetic garments you would need Rit DyeMore for Synthetic Fibres. Dyeing a garment, or even better several at a time, has a number of more sustainable advantages over buying new ones through waste reduction, increasing garment longevity and reduced environmental impact and water use.

Two tops dyed black (dark grey result) & shortened

I have used Dylon in the machine many times very successfully. Usually I save up a few things that I want a particular colour so that I get the best use out of a dye pod. I have dyed trousers, tops and dresses which I have gone on to wear much more than if I'd left them the colour they were. You can use RIT in the machine too but it's more of a palaver than Dylon. I have used RIT very successfully in a tub to dye wool and cashmere and been pleased with the outcome.

Cashmere cardi dyed from bright orange to khaki using RIT All Purpose Dye

It may not be the colour of a garment that's the problem, it may be something to do with the fit. I often find things are too long as I'm quite short and have successfully shortened several tops and trousers so they are a length I am more comfortable with. I have even done this with jumpers where I have cut off the bottom, picked up the stitches and knitted a new edging at a better length. This is more complicated than just stitching something up but if you are a knitter or know one who could help, this might be an option for you... 

Jumper - Bottom and sleeves cut off & re-knitted to be shorter

Maybe it's something cosmetic about a garment. Perhaps you just don't like the buttons. These can easily be changed. In fact you might already have some suitable buttons in your button tin, or might find some in your local charity shop or haberdashers.

Shirt dyed from cream to black (dark grey result) with Dylon. Original plastic buttons replaced by mother of pearl buttons from my stash

Finally it might be that a mend that is needed. Your garments might have a hole or be wearing thin. This too can be easily remedied with a patch, a darn or some reinforcing stitching. Or perhaps you need to cover up a stain, or some marks which you could again do with some decorative stitching or add some patches. You might want to consider whether you want to go down the route of visible mending or the more traditional route.

Stitching on trousers backed on the inside with fabric where trouser fabric is wearing thin

Apron with patches & stitching, Boro style, to cover a stitched design I didn't like

If things are a little big you might be able to take them in or use one of the alteration services that many towns and cities have.

I often combine several of these techniques and you could too and give your wardrobe a whole new lease of life without having to buy anything new!

And if you want to read about one of my visible mending projects, click here.


Saturday, 13 June 2020

Dyeing with Forget-Me-Nots

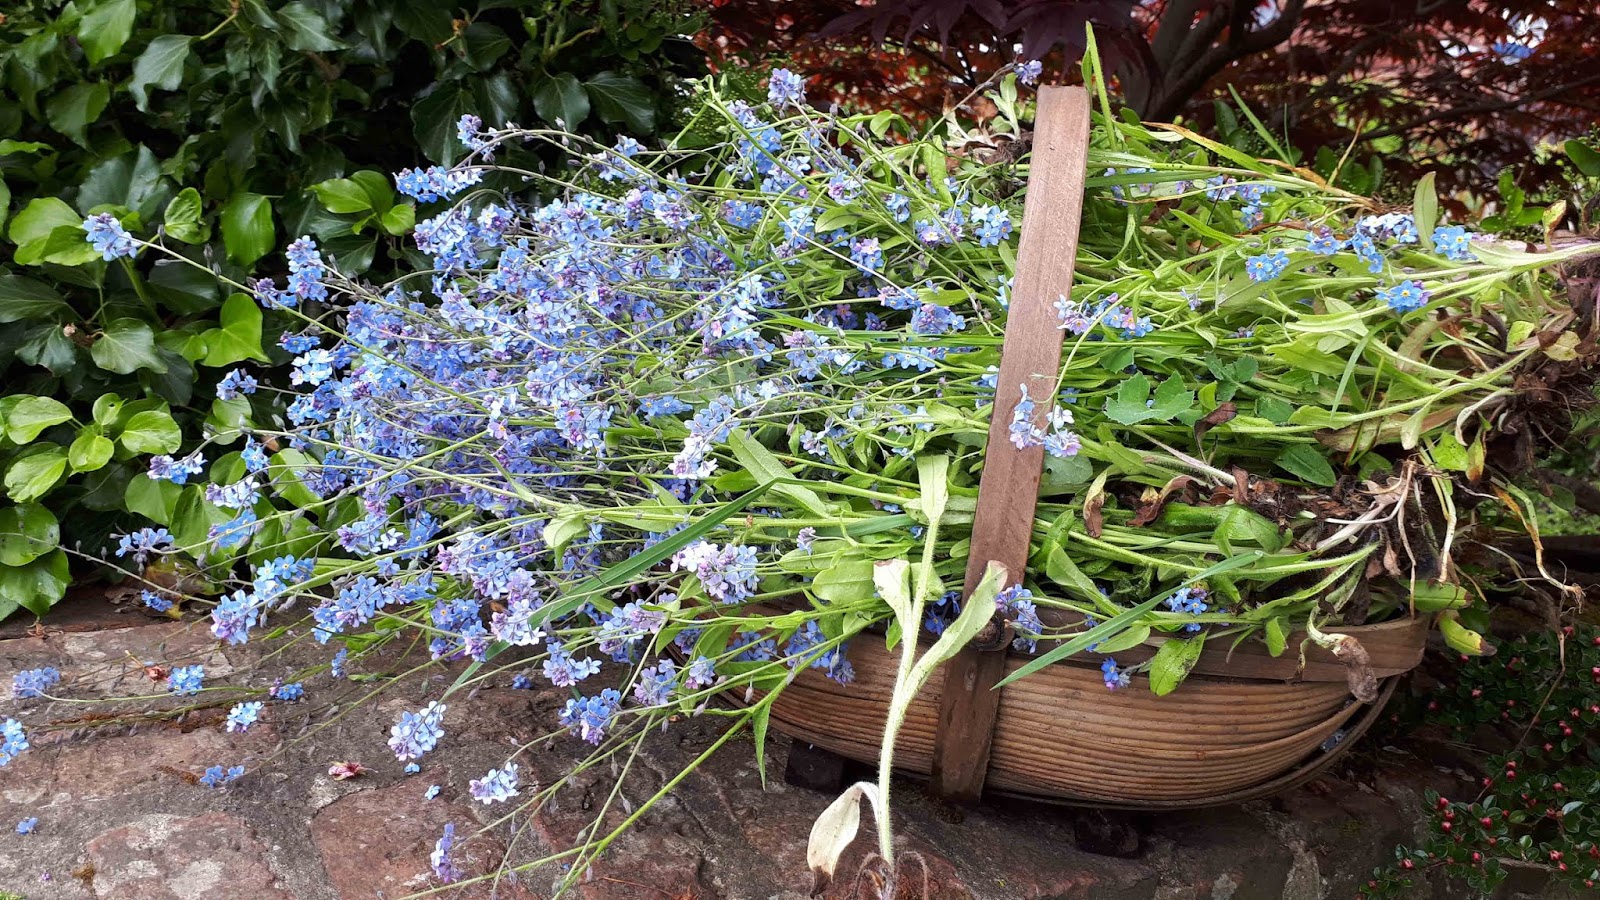
Basket of Forget-Me-Nots

Having had some success with my rhubarb leaf dyeing, and more limited success with dandelions, I decided to have a go with forget-me-nots as this is another plant that we had in abundance in our allotment...

Forget-Me-Nots in the Allotment

Having gathered them, I pulled the flowers off and added them to the dye pan. I had a little more weight in forget-me-not flowers than in fabric but not a lot and certainly not twice the weight of fabric in forget-me-nots which would have been ideal....

Forget-Me-Not Flower Heads in the Dye Pan

Dye Pan Flower Detail
The fabrics I chose to dye were some wool yarn, wool blanket and cotton calico.  They were soaked overnight in soy milk which I had read acted as a mordant for cotton fibres.  A mordant is a dye fixative.  It helps bind the dye to a fabric to make it more colourfast and can affect the resulting colour.  For example, mordants may intensify the dye colour.  Alum was recommended for wool but I didn't have any of that so I soaked them all in the soy milk (1 part soy milk to 4 parts water).  I could only get light soy milk.  I don't think this worked as well as ordinary soy milk would have.  I dried the fabric before putting it in the dye bath.

Fabric to Dye

To make the dyebath, I covered the forget-me-nots with water and simmered them for an hour and then removed the plant matter by straining. 

Sieve of Plant Material to be Discarded

The remaining liquid formed the dyebath to which I added the dry fabric.  My pan was aluminium as this was all I had. Ideally you would use a non reactive pan made out of stainless steel.   I simmered the dyebath for about an hour, during which I added a few rusty nails as nothing much seemed to be happening.  I thought this might help as you can use iron as a mordant too.  The recipe for an iron based mordant involves soaking some iron objects in 2 parts water to one part vinegar solution for a couple of weeks until it goes a rusty orange colour so this intervention was unlikely to have a great effect.

Dye Bath & Fabric

I left the dyebath to cool overnight...

Dye Bath After Cooling Overnight

The following day I rinsed out the materials, washed them and hung them up to dry.  Here are the results together with a little sample of the original fabric to show the colour change...

Before and After Dyeing Results

I was hoping for a blue colour and when the dye pan started heating up the water was very green so I thought a greeny colour might be a possibility.  However, the outcome was very similar to that of the dandelion dyeing which frankly, was a little disappointing. I may have overheated the dyebath which resulted in a more neutral colour than expected. I would also probably have got a better result if I'd been more careful with the mordanting process and used more forget-me-not heads.

Forget-Me-Not Dyed Items

The forget-me-not yarn and blanket were slightly paler in colour than the dandelion dyed pieces and the calico was very similar in colour bit a slightly different shade...

Wool Yarn

Wool Blanket

Calico

Not sure yet what I shall use the fabric and yarn for but interesting to experiment.  Why not have a go with some of your abundant plants?


Tuesday, 17 March 2015

Fabric Bowls

I belong to a textile group called Nest of Makers - who are a very friendly bunch.  We get together and sometimes we do our own thing and sometimes we have a skill sharing session.  At our last meeting Heather Chalkley showed us how to make fabric bowls.  I've only ever made these using hand stitching before and that was very time consuming.  Heather showed us how to make them using a sewing machine and we made rapid progress.


Fabric ripped into strips and ironed - it's good to have more than one fabric

You need fabric + matching thread, polypropylene rope, a sewing machine, some pins and a small bulldog clip.


Polypropylene rope

Then away you go ...

Sewing in progress!
You can see how much rope is needed for one bowl!

By the end of the day there were some lovely bowls ready for use!

After our lovely bowling day I went home enthusiastic to make more.  I decided I would use neutral fabric and stitch with neutral cotton thread and dye them.  So that's what I did.  After dyeing them all over, I then inverted the bowls in a shallow dye bath to get a contrasting colour on the rim.

An undyed bowl

Finished bowls

Here's what I learnt ...

It's quicker to use patterned fabric to get a colourful result and you don't need that much!

If you put a wet inverted bowl in the dye bath you get a rim that is just the area covered by the dye bath.


If you put the inverted bowl in dry the dye rises much further up the bowl but you get a nice shading effect ..


If you don't like the colour you have some scope to change it

 
Blue with green


Becomes blue with black!
 
and it can be quite addictive ...

Lots of bowls

The printed fabric bowls have gone to new homes and after some more dyeing this is what I've ended up with in the dyed bowls line ... 


In the end I made 8 bowls and used about 50m of rope.  Hold on to your washing lines - they may not be safe with me about!

Tuesday, 21 January 2014

More Big Knitting - Textured Cushion


Dyed textured cushion

Having got the bug using large needles I decided to press on but with something a little easier and more conventional than my #Wovember Big Knit Pumpkin Pouffe project (http://hippystitch.blogspot.co.uk/2014/01/wovember-project-finished-for-christmas.html). So, I got out my 25mm straight needles and selected a ball of green Boodles Textile Yarn.  This is a chunky, oversized yarn that looks like it's been made out of T shirts.  It is, in fact, made from offcuts from the textile manufacturing process, may have colour & thickness variations and has plently of knots.  To knit up with it, I chose a cone of super chunky wool that I bought at the Knitting & Stitching Show in Harrogate in November. This is in a natural cream but will be dyed a shade of green which I hope with the Boodles yarn will produce a variegated green result.

The needles are about 38cm (15 inches) long and 25mm (1 inch) in diameter. Here they are ...

25mm Knitting Needles

and here's the yarn (already partly used up) ...

Yarns

My project was to knit a cushion approx. 40cm square (16 inches)  with an alternating pattern of garter and stocking stitch blocks.  Here it is in progress (this has used up all of one ball of Boodles)...

Big kniting in progress

And here it is finished but not sewn up ....

Finished Big Knitting

It measured approx. 40cm by 100cm (16 inches by 39 inches).  You can see how much yarn was left from my 2 balls of Boodles and my cone of wool.

Here it is stitched up ...

Finished cushion before dyeing

Now on with the dyeing.  This has been another saga.   First I tried using Dylon Olive Green hand dye, having washed the cushion.  I did this in a bucket using two packets of dye.  The bucket frankly could have done to be bigger - alot of slopping of dye went on.  The result was very disappointing.  These dyes state that they give lighter colours on wool but all I got was an extremely pale green.  I think this may have been because there was some dressing on the wool yarn and that really the cushion needed soaking overnight to remove it.    Next, I went for some acid dyes and mixed a sort of dull lime green using Art Van Go and Colourcraft acid dyes.  Acid dyes require heat so you do this in a large pan (e.g. a jam pan) on the stove top.  This was more successful although the application of heat, stirring and washing has resulted in some felting of the yarn (which was what I was trying to avoid by using the Dylon dye).   

Wool yarn - from white to pale green to dull lime
 
The dyes had less effect on the Boodles yarn


I've not yet decided whether it lives up to my expectations.  It didn't take long to knit up -  a couple of evenings (not full time).  I took inspiration from Becca Smith's book "Big Stitch Knitting" for tension, yarns and patterns and then adapted it all to my project.  The dyeing and trying to get the cushion dry (it was/is very heavy!) was a more involved process.  Acid dyes are much more effective to get true colours though.  

Note to self: don't forget the value of preparing samples first to check out likely results.  At least the final colour was more or less what I was aiming for!