Showing posts with label upcycling. Show all posts

Monday, 1 February 2021

Share the love - Valentine's Day Cards


Love Heart Valentine's Day Card

I really love receiving cards and letters in the post.  I'm a big fan of snail mail and I don't think I'm the only one.  Particularly this year, when we can't see who we want when we want, it's a good time to share some love.  Valentine's Day, 14th February, is coming up and offers an opportunity to do just that.  Don't feel the need to confine your cards to your true love - how about sending a card to a much missed friend or a family member to show you are thinking of them.  In fact why wait till Valentine's Day?

Which heart would you choose?

In preparation, I have been making some love heart cards using upcycled drinks cans, some fab textured card and paper and a smattering of stitch.  They are now available in my Folksy shop here.

Love Heart Detail


And another thing - picture stamps make a letter even better.  The current lovely stamps are of the nation's National Parks.  There are 10 different first class stamps.  If they haven't got them at your local post office and it seems to be increasingly difficult to get them locally, you can buy them online from Royal Mail here.

So, go on, make someone's day, send a card and share the love!


Saturday, 2 May 2020

Big Knitting Creates a Rainbow

Big Knitted Rainbow and Little Knitted Rainbows

I recently knitted some little rainbows, that are currently hanging in my window but which will be heading along to the Rainbows for Rowntree Park yarnstorming project in due course. Offering a visible thank you to the NHS, they were also fun to make, look very cute and definitely contibute a positive vibe which is much needed at the moment.  So, what next? I decided I'd like to make a big knitted rainbow.  My big knitting needles are 20mm in diameter so need some big yarn.  I save colourful old T shirts in case I might be able to recycle them for a craft project and here they came into their own!  I didn't think I'd have a rainbow's worth of colours but it turned out I did...

A Rainbow's Worth of Old T Shirts

So I got to work preparing some upcycled T-shirt yarn.  You fold your T shirt not quite in half lengthways and cut strips not quite to the edge. Then unfold and at the edge where it isn't cut through make a series of diagonal cuts to produce a continuous piece of yarn. You can use the sleeves as well.  I cut my strips about 1 inch/2.5cm wide.

Fold T shirt Over and Cut Strips

Unfold T shirt to Reveal Cut Strips

You can find a great YouTube video from Sustain my Craft Habit showing you exactly how here.  All my adult T-shirts produced over 20m of yarn each...

Big Needles and T-shirt Yarn

I cut up 2 red T-shirts in different shades of red as I knew I would need more than one T-shirt's worth of yarn for the red section of my rainbow. Next I started knitting...

Casting On With The Big Needles

The pattern I used was from Knitting by Post and was the Easy Medium Sized Knitted Rainbow knitting pattern.  I only knitted with half the number of stitches as my rainbow wasn't going to be double sided. Here it is knitted up...

Big Knitted Rainbow

Next I attached it to some plastic fencing using some of the T shirt yarn and some clear fishing line.  Then I made a whole load of cloud coloured pompoms in different sizes...
 
A Suitcase Full of Pompom Clouds
 

and attached them to the bottom of my rainbow.  The finished item was up on my railings in time to "Clap for our Carers" where we show our appreciation with some hearty applause for the NHS and all the key workers keeping things going during the pandemic.

Finished Big Knitted Rainbow

My big knitted rainbow is about 1 metre wide and 0.5 metre high.  I don't think you'll miss it if you're passing by!  Why not hunt out your old T shirts and have a go?


Tuesday, 2 February 2016

Quick & Simple Upcycle Project - Suitcase with Vintage Maps

Recently at a vintage fair I bought a little suitcase - mostly for the contents (more of that another time) but also because even if a bit battered it's quite cute.  I haven't got a completely "before" pic.  It did have quite a lot of paint on it and it wasn't till I got it all off that I thought to take the first pic.


Suitcase - bottom

The inside was completely grotty and I have taken a photo of those stained wrinkly insides ...


stained and grotty insides

So having got the paint off the outside and cleaned the suitcase up - mostly with a cloth and hot soapy water I took out all the horrid stained paper insides which were beginning to peel off anyway.  Any bits that remained stuck, I moistened with a damp cloth then scraped them off and gave the whole inside a good wipe out.  Then I left it to dry.

Vintage map interior

A vintage map interior would be just the job, I thought.  Looking through my map collection, Bartholomew's Firth of Clyde seemed to fit the bill nicely.  I cut the map to fit.  One piece was enough for the lid but the base needed 4 pieces - 3 for the two sides and front and one for the bottom and back.  I had to join one piece on one side mainly to get the bits of map I thought would look best - they don't all join together mapwise but they look reasonably coherent.  
 

new vintage map insides

Of course you could have all completely different map pieces if you wanted.


I used some new glue that I got the same day as the suitcase.  It had been recommended.  I opened it and was immensely impressed with the design.  In the centre of the jar was a special place for a mini glue brush - how cool is that!  I used it to glue my map pieces in place and it was excellent.  Here's the finished product ...


Upcycled suitcase with vintage maps

I did it all one evening, let it dry overnight and next day it was ready to use.

Tuesday, 28 January 2014

Upcycled Shirt - Now a Cushion

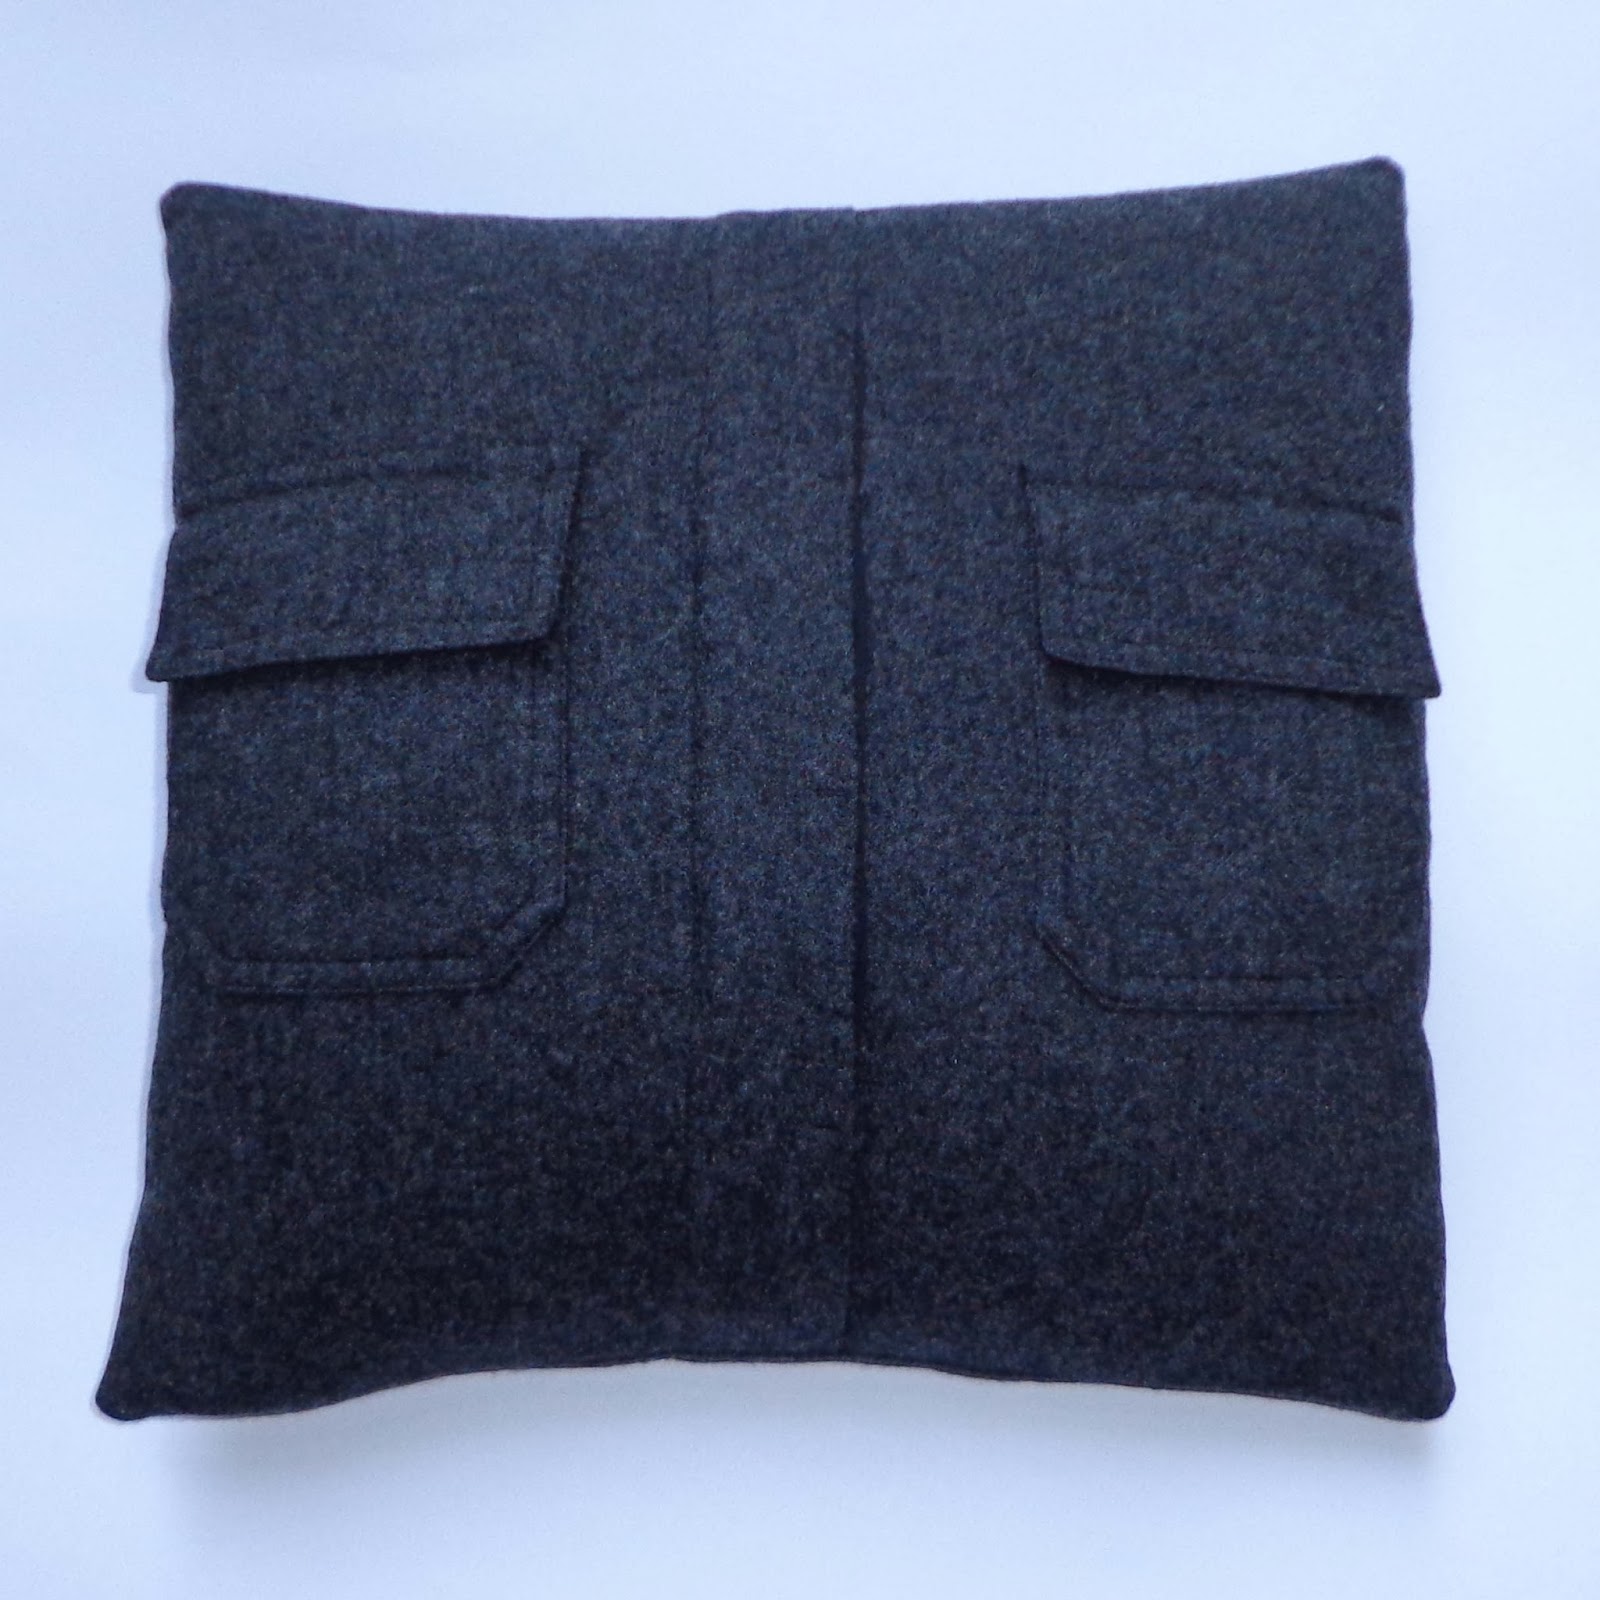
Wool Shirt Cushion

Recently I spotted a rather nice grey shirt on the reduced rail in my local charity shop.  It was only 50p and it was 80% wool.  I thought it had potential so I snapped it up.  After pondering (briefly) about the possibilities I decided that its fate was to become a cushion.  One reason for this was the rather nice placket it had down the front, covering the buttons - an instant opening for the cushion pad.  Also, I liked the shirt pockets (with flaps) on the front - excellent places to secrete Freddo bars for some secret indulgence whilst watching a favourite TV show or DVD.  

So, I set about the transformation.  It was quick & inexpensive to make - no fraying edges to finish off, ready made opening for the cushion pad, just the corners to trim and hey presto it's done.  (It'll even match the #Wovember Big Knit Pumpkin Pouffe - http://hippystitch.blogspot.co.uk/2014/01/wovember-project-finished-for-christmas.html).

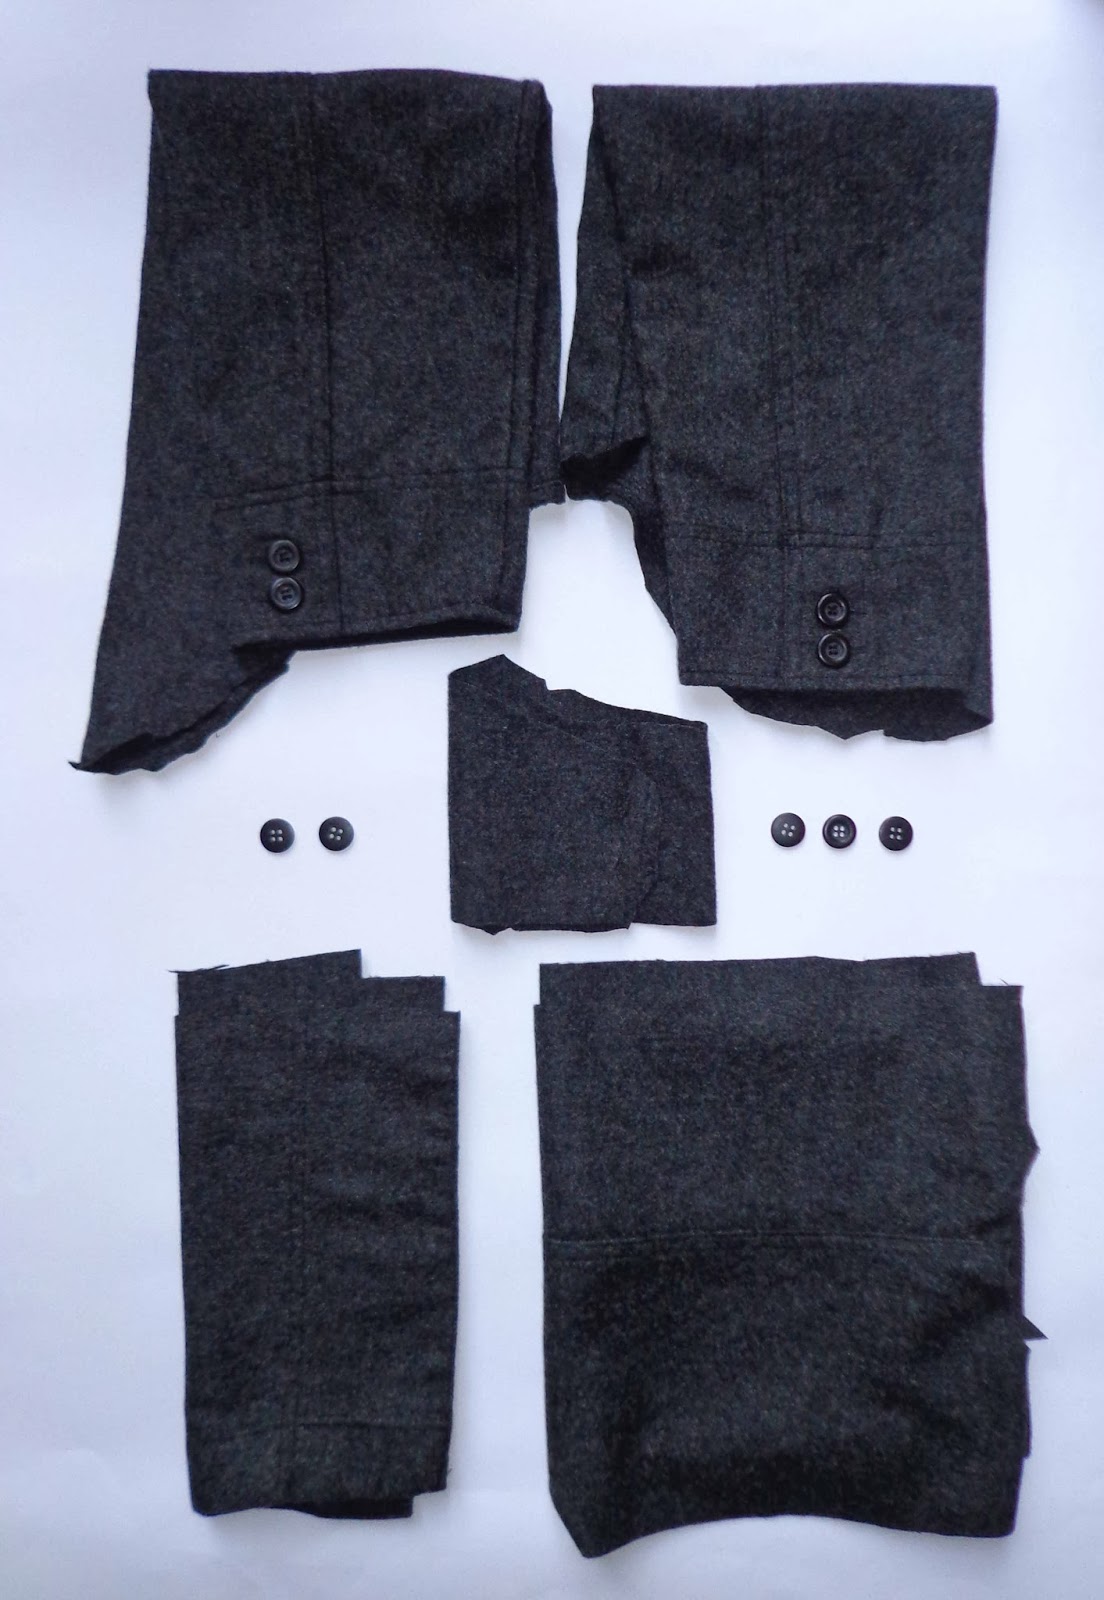
And on top of all that I still have some bits left over to make other things:

Leftover bits of shirt for future makes

I did throw a few bits away but not many.  Why not have a go?

Thursday, 16 January 2014

Another "How to make ..." - Paper Decorations - Valentine's Day 3D Hearts & More


Those of you that have visited the "How to make ..." page on my blog will know that there have long been instructions on how to make pompoms.  You'll be pleased to know that I've recently added another quick make in time for Valentine's Day in the form of some upcycled 3D paper heart decorations.  They can of course be used for other occasions and can be easily adapted for more general use.  I did make some round ones in time for Christmas - and made some map based ones for the Geographers I sometimes hang out with, and one for a Iorek Burnison fan (featuring Svalbard of course!). You can string them together to make bauble bunting - great for any celebration.

Paper Bauble Bunting

Hope you like them - have a go it won't take long and it could use up some of your recycling waste!  The link is here:


Thursday, 18 April 2013

Yet More Embroidered Jumpers!

Fairy princess embroidered jumper
Yet again I have to apologise for the title - it isn't "Yet More Embroidered Jumpers" - it's "Yet More Embroidered Jumper".  

I think it's becoming a bit of a thing!  I now have a little stock of jumpers waiting to be upcycled & embroidered with some strange & wonderful(?) phrase.  

The cycle begins like this, first scour the charity shops for suitable candidates (in jumper terms that is - I like to buy pure wool ones in nice colours - which generally, for me, means anything that isn't brown), then await inspiration in terms of a phrase (this can be immediate or very slow - write them down when you think of them - then you'll have some to choose from.)  Next, plan out how the phrasing will look - capitals, joined up writing, one line, several lines, any additional details etc., draft it out exactly as you want it to appear on the jumper and get going!

I have just completed a lovely pink sparkly one with "fairy princess" on.   .... And no, it wasn't for a littley, it's with a large pinch of irony for a teenager.  Don't know what everyone else thinks but it's certainly keeping us entertained.  Although the next one in the pipeline probably rates as an "in joke" so I'm not sure whether it'll ever see the light of day.  Watch this space ...


Quick comment on this jumper - I won't be using the sparkly pink thread again - it made it very hard to thread the needle and from time to time the thread itself, which is like a continuous chain stitch, just all came undone and had to be finished off quickly to stop it affecting what I'd already done.  

If you'd like to know how to do these jumpers in more detail leave a comment.  They're a fun way to spend a few hours and you can wear them afterwards.

You might like to take a look at my other embroidered jumper blogs:

http://hippystitch.blogspot.co.uk/2013/03/more-embroidered-jumpers.html

http://hippystitch.blogspot.co.uk/2013/01/happy-new-year-with-embroidered-jumpers.html

Wednesday, 6 March 2013

More Embroidered Jumpers

An over zealous title I'm afraid.  Really it should be "More Embroidered Jumper" but that sounds a bit funny.  Anyway this is just to let you know I've completed another jumper - this time with BOOM on the back.  And the jumper was green to start with!  I did wonder, when I was embroidering it, whether the black would run into the green in the wash.  But I didn't let that stop me.  And guess what - it did! 

However a couple of packets of Colour Run Remover and a couple of days later and the runs have gone.  The jumper is now yellow - a happy coincidence because I had wanted to use a yellow jumper in the first place - just couldn't find a suitable one.   So hurray for Colour Run Remover! But on a cautious note - you do have to be a bit careful when you use it.

If you like the scarf teamed with the jumper this is by York based textile artist Karen Mabon.  She does lots of great scarves which you can find at
http://www.etsy.com/shop/redbricknorth 

Tuesday, 1 January 2013

Happy New Year with Embroidered Jumpers

Moustache Embroidered Jumper
The Cat's Pyjamas Embroidered Jumper


Well I've had a rest from my usual makes to try something a little different for me.  I've been working on a couple of jumpers and thought you might like to see the results - just finished in time to welcome in the New Year. 


Happy 2013 by the way.  Hope it has started well for you all!